Bootstrap Tabs Border
Introduction
Sometimes it's pretty useful if we can easily just place a few segments of information sharing the exact same place on webpage so the site visitor easily could explore throughout them without really leaving behind the screen. This gets simply obtained in the brand new fourth edition of the Bootstrap framework with the help of the
.nav.tab- *Exactly how to use the Bootstrap Tabs Form:
Firstly for our tabbed control panel we'll require a number of tabs. To get one develop an
<ul>.nav.nav-tabs<li>.nav-item.nav-link.activedata-toggle = “tab”href = “#MyPanel-ID”What is simply brand-new inside the Bootstrap 4 framework are the
.nav-item.nav-link.active<li>Right now when the Bootstrap Tabs Form system has been prepared it is actually opportunity for developing the sections keeping the concrete information to get shown. First we need to have a master wrapper
<div>.tab-content.tab-pane.fade.active.in.fade.tab-panelid = ”#MyPanel-ID”You have the ability to likewise set up tabbed panels working with a button-- like appearance for the tabs themselves. These are also named like pills. To accomplish it simply just make sure as opposed to
.nav-tabs.nav-pills.nav.nav-linkdata-toggle = “pill”data-toggle = “tab”Nav-tabs practices
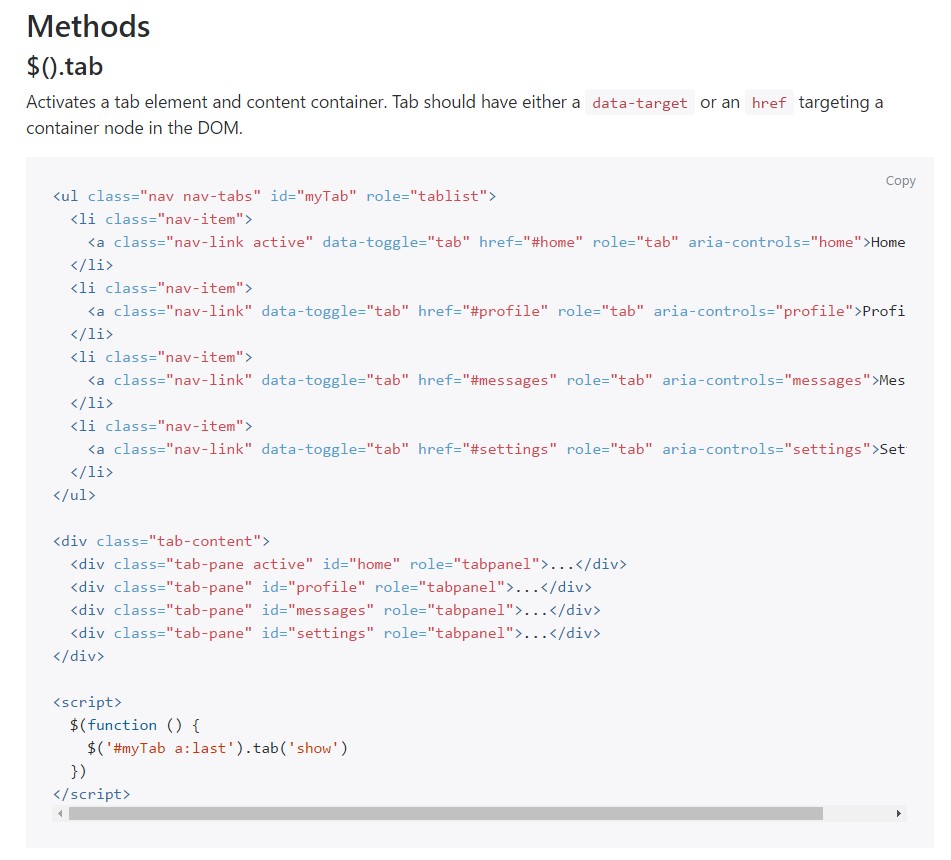
$().tab
$().tabTurns on a tab component and material container. Tab should have either a
data-targethref<ul class="nav nav-tabs" id="myTab" role="tablist">
<li class="nav-item">
<a class="nav-link active" data-toggle="tab" href="#home" role="tab" aria-controls="home">Home</a>
</li>
<li class="nav-item">
<a class="nav-link" data-toggle="tab" href="#profile" role="tab" aria-controls="profile">Profile</a>
</li>
<li class="nav-item">
<a class="nav-link" data-toggle="tab" href="#messages" role="tab" aria-controls="messages">Messages</a>
</li>
<li class="nav-item">
<a class="nav-link" data-toggle="tab" href="#settings" role="tab" aria-controls="settings">Settings</a>
</li>
</ul>
<div class="tab-content">
<div class="tab-pane active" id="home" role="tabpanel">...</div>
<div class="tab-pane" id="profile" role="tabpanel">...</div>
<div class="tab-pane" id="messages" role="tabpanel">...</div>
<div class="tab-pane" id="settings" role="tabpanel">...</div>
</div>
<script>
$(function ()
$('#myTab a:last').tab('show')
)
</script>.tab(‘show’)
.tab(‘show’)Selects the presented tab and reveals its connected pane. Other tab which was recently chosen comes to be unselected and its related pane is covered. Turns to the caller just before the tab pane has in fact been presented (i.e. right before the
shown.bs.tab$('#someTab').tab('show')Events
When demonstrating a brand new tab, the events fire in the following structure:
1.
hide.bs.tab2.
show.bs.tab3.
hidden.bs.tabhide.bs.tab4.
shown.bs.tabshow.bs.tabIn the case that no tab was currently active, then the
hide.bs.tabhidden.bs.tab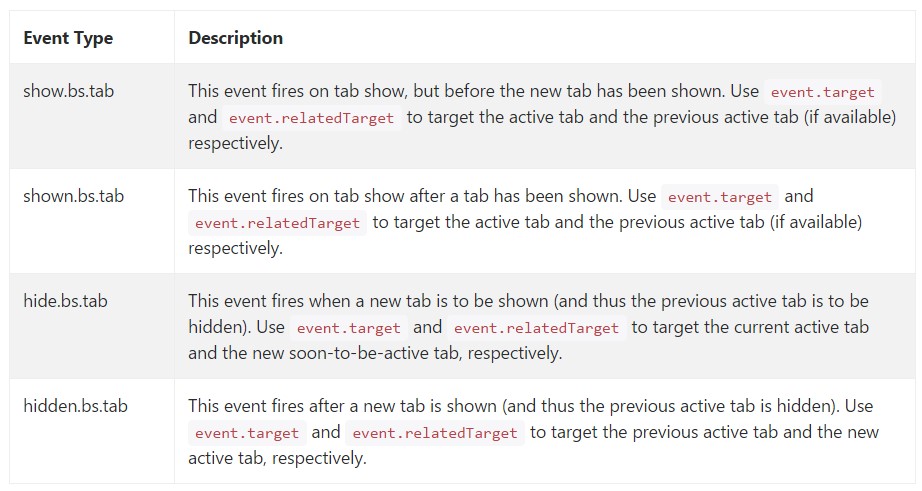
$('a[data-toggle="tab"]').on('shown.bs.tab', function (e)
  e.target // newly activated tab
  e.relatedTarget // previous active tab
)
Final thoughts
Well actually that's the manner the tabbed control panels get set up by using the newest Bootstrap 4 edition. A thing to look out for when making them is that the other materials wrapped within every tab section should be basically the same size. This will definitely assist you prevent several "jumpy" activity of your web page once it has been certainly scrolled to a particular position, the site visitor has started looking via the tabs and at a special moment comes to open up a tab together with considerably additional material then the one being certainly seen right before it.
Examine a number of youtube video information relating to Bootstrap tabs:
Related topics:
Bootstrap Nav-tabs:official documents
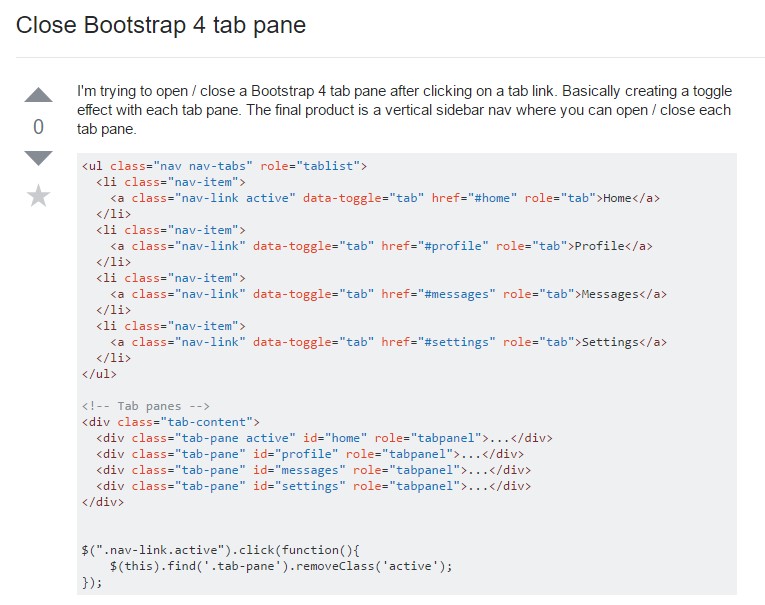
The best way to turn off Bootstrap 4 tab pane
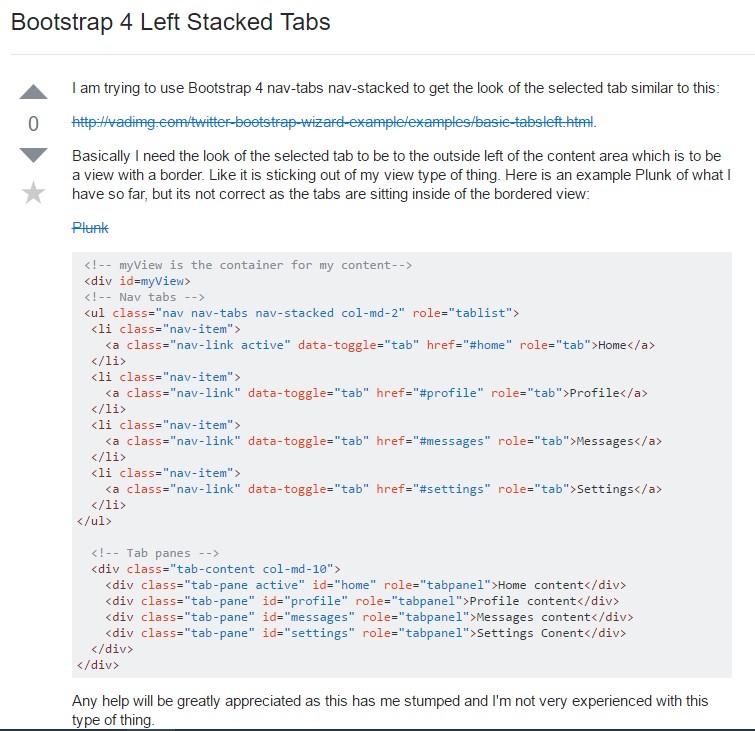
Bootstrap 4 Left Stacked Tabs